

Hello,
Welcome to my Blog Page, in this tutorial I am going to take you through the process of how to integrate push notification using FCM in flutter app.
In this tutorial I will impart you about how to send notification from one device to another device.
The primal application of this app is to make user notify about what task has been assigned and by whom.
This tutorial is divided into two parts: -
A) Setup Firebase project for cloud messaging.
B) Perform Push notification in Flutter
Note: - If you are aware about how to create project in firebase then you can directly skip to the second part of the tutorial.
Let’s begin 🚀🚀
1) Go to Firebase Console.
Click here to open Firebase Console
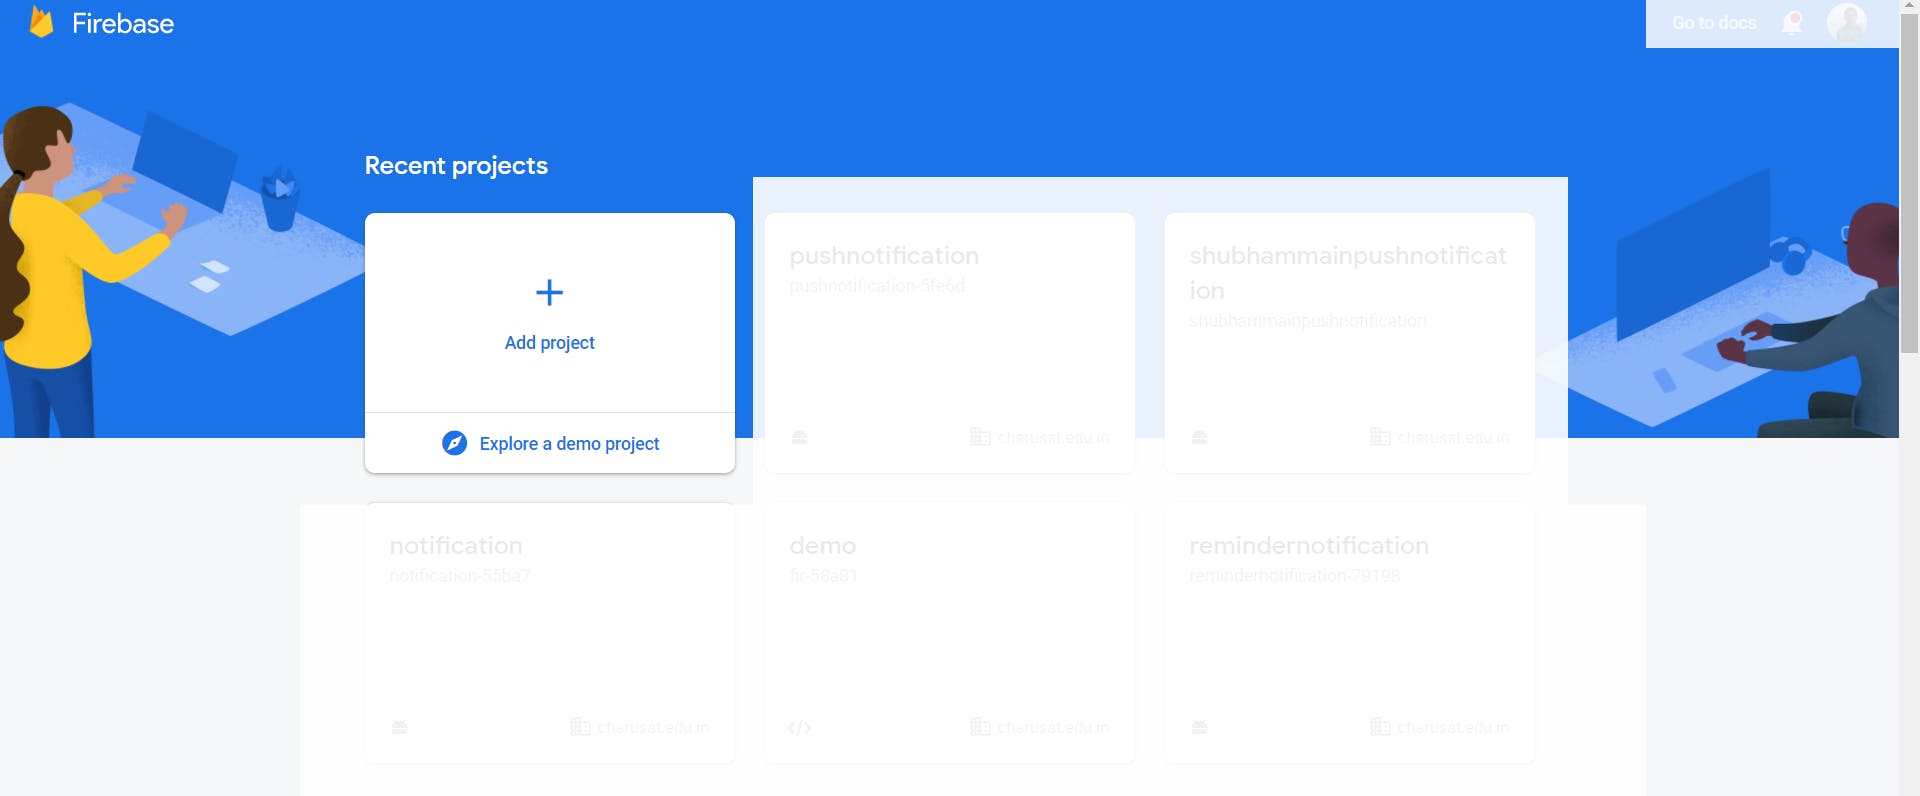
2) Create Firebase project
Click on Add Project.
It initiates the firebase project creation process.
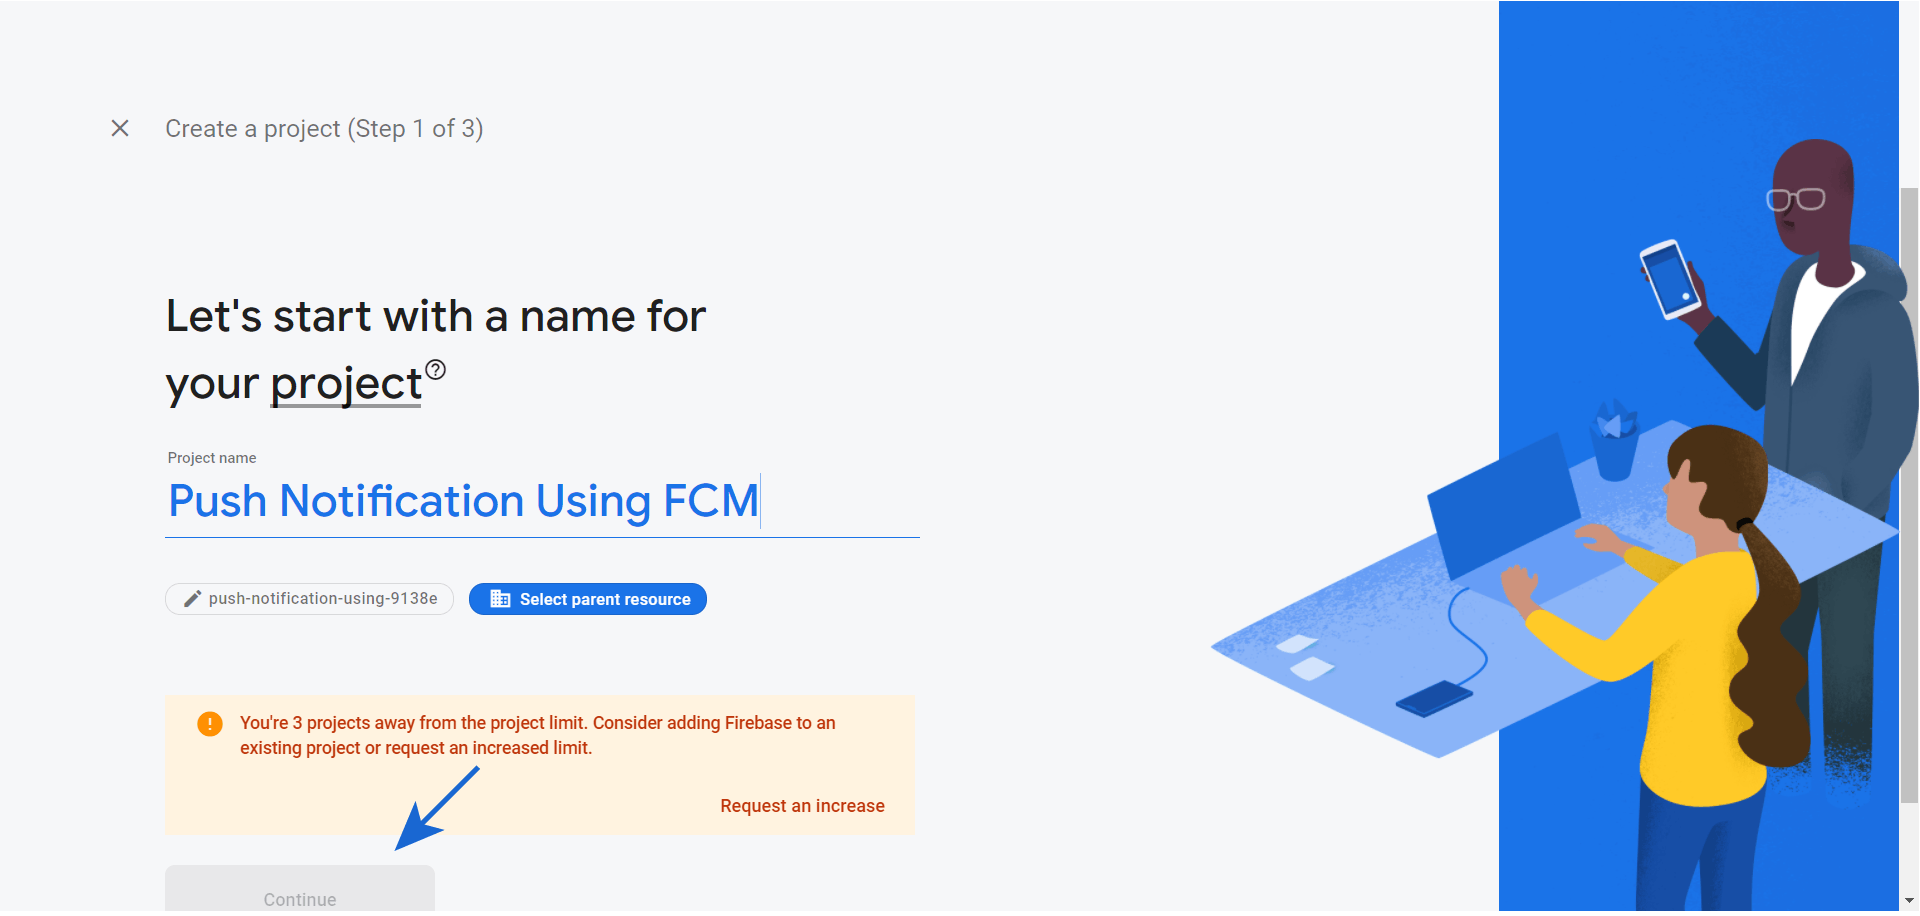
3) Give a name to project and continue.
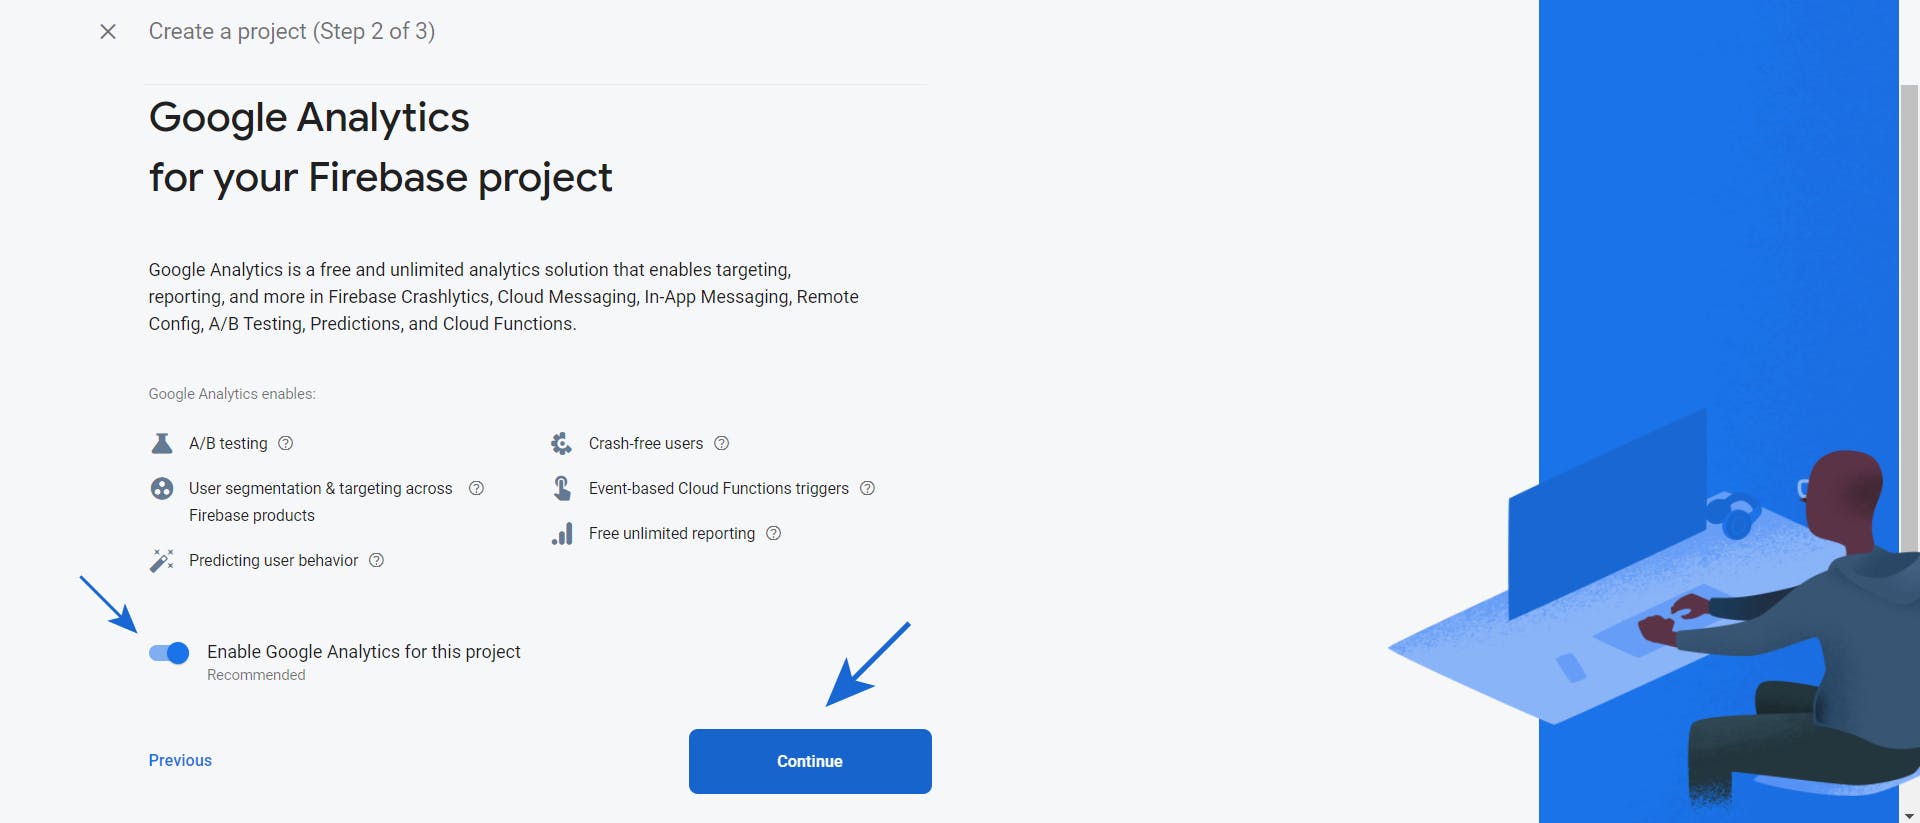
4) Now Click Firebase analytics (Optional) and Click continue.
5) Select old firebase analytics account or create now as given below.
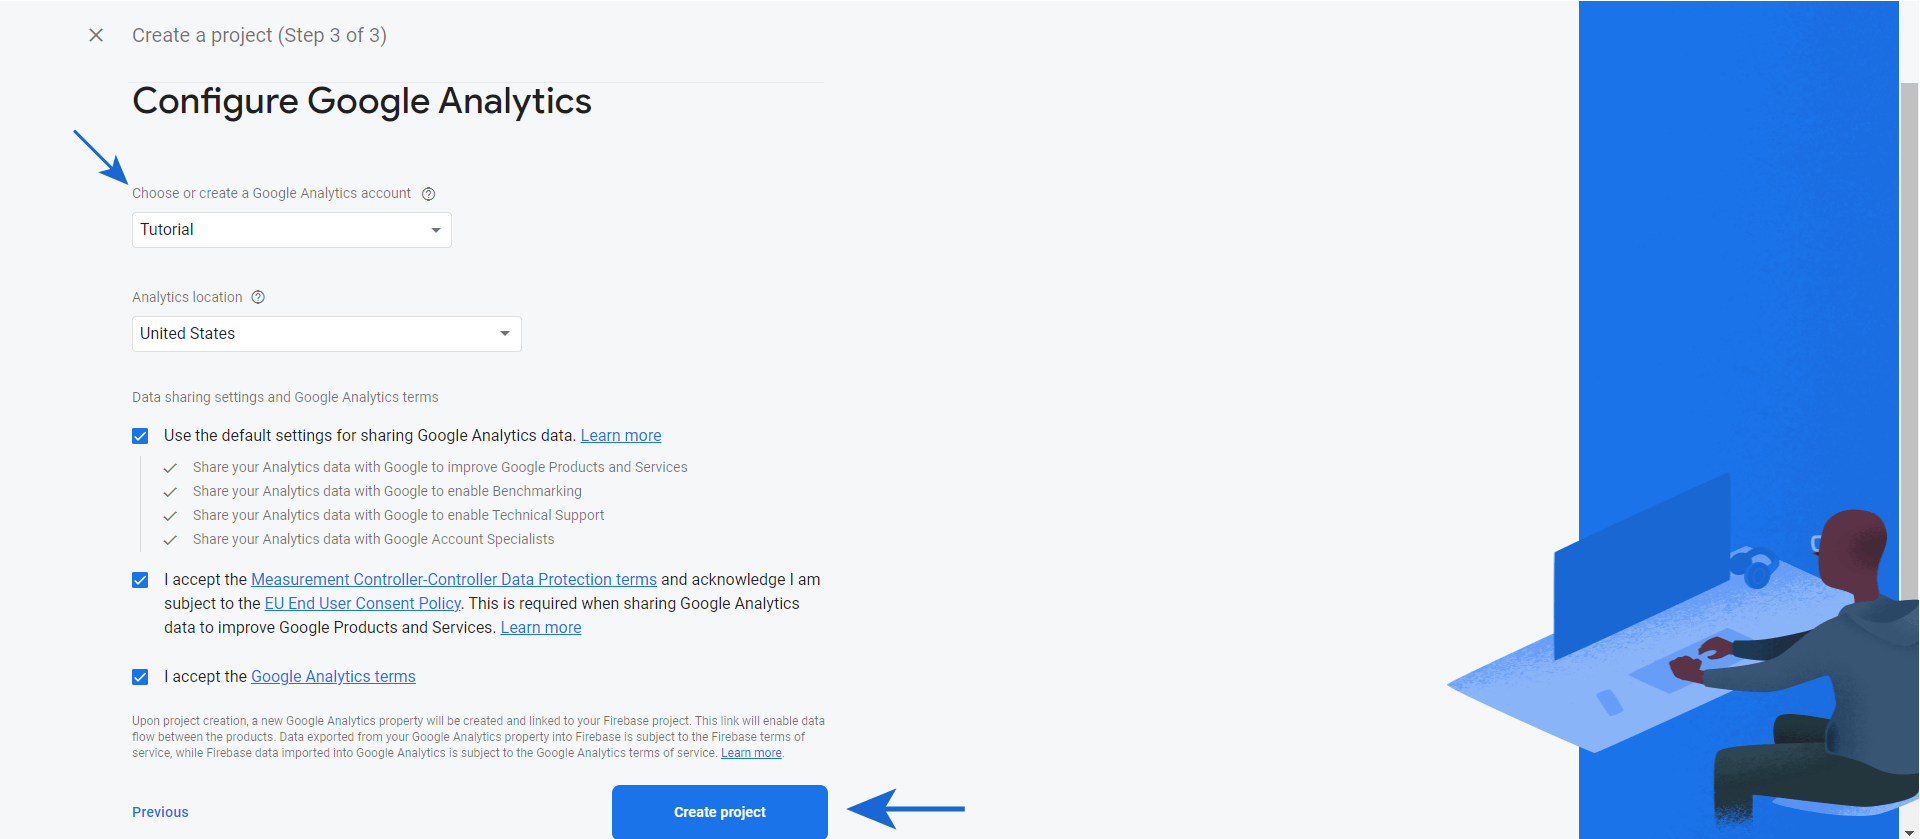
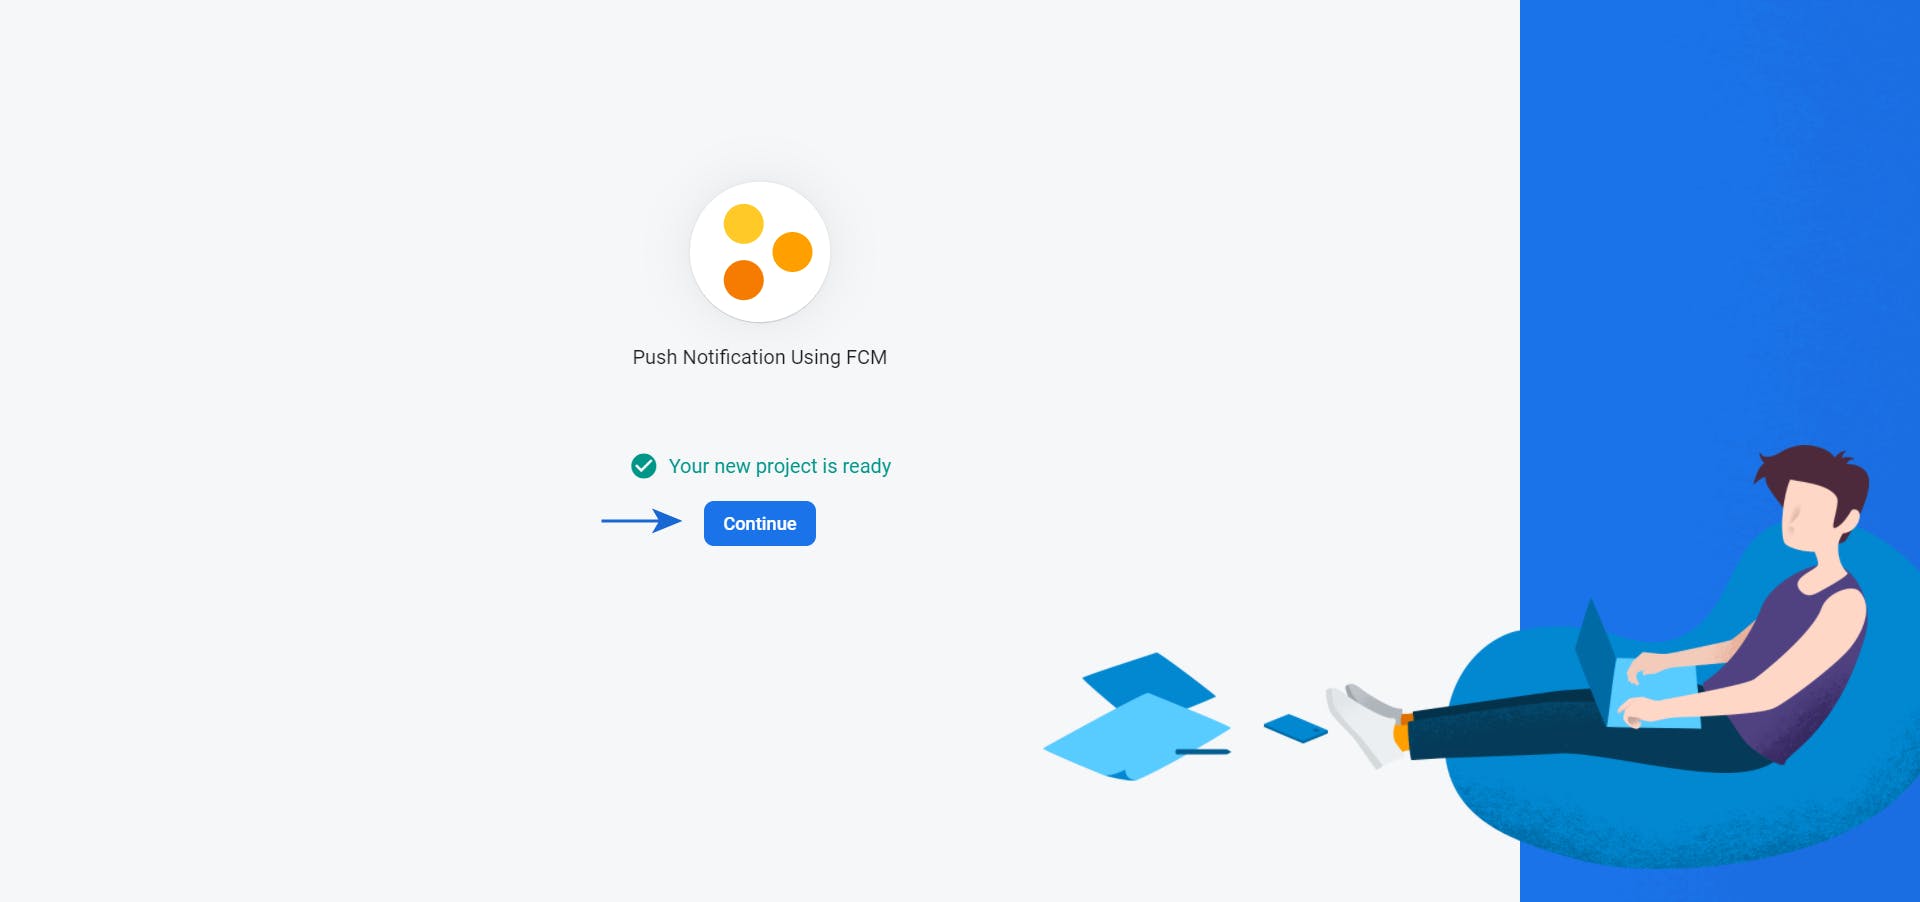
And it's Done!! The project is successfully created 🥳
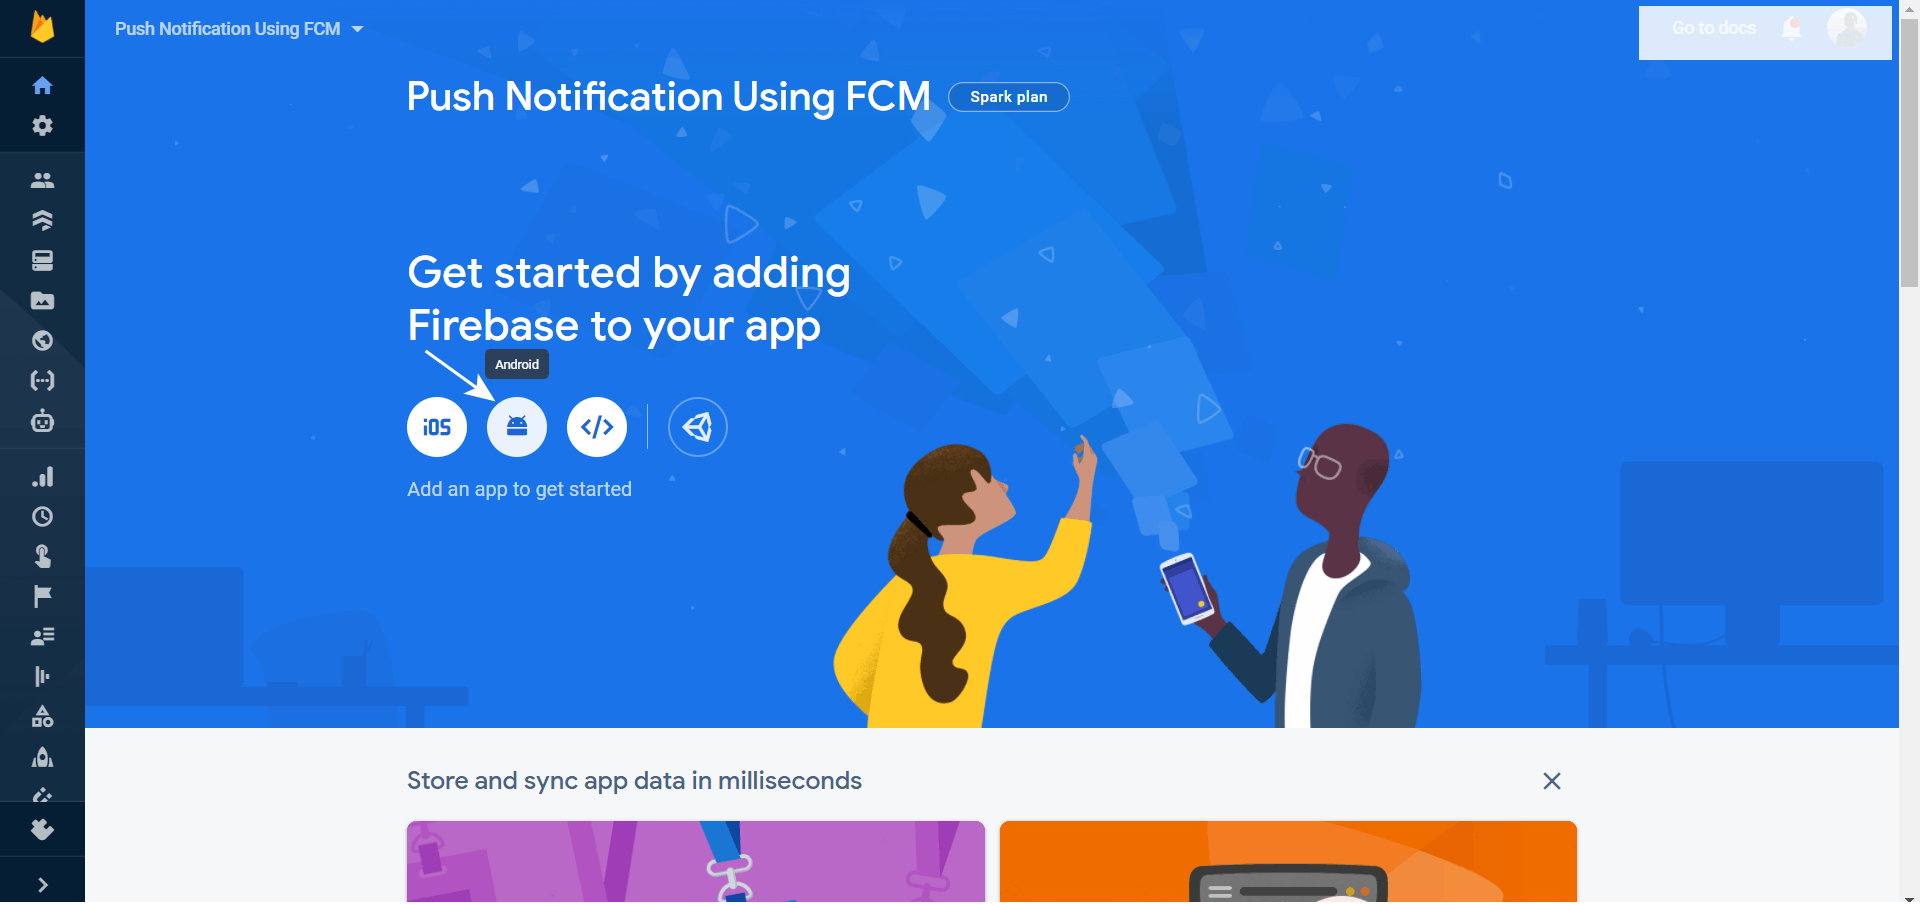
6) Connect your app to Firebase project.
To connect your app to Firebase, Go to Dashboard and click on the icon of android or iOS whichever app you want to connect
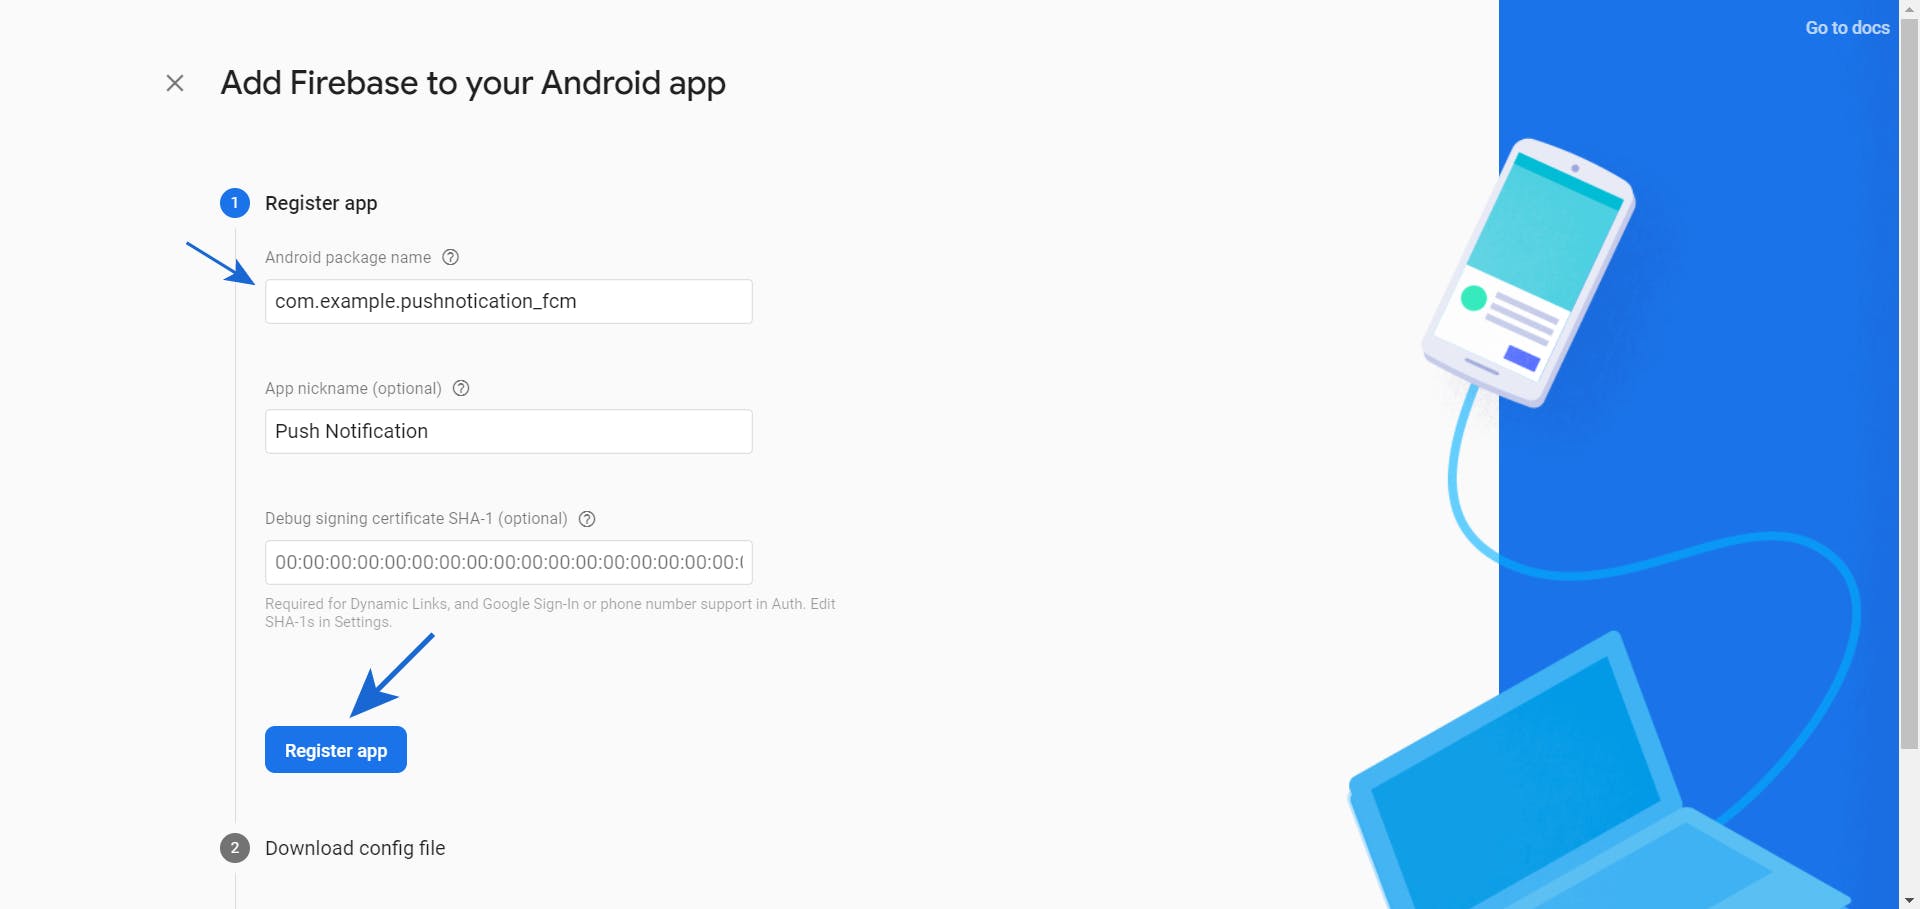
7) Now we have to register our app.
So now we have to enter Android package name, after that click register to continue further.
Eg. Go to your flutter project and open android/app/build.gradle file and copy applicationId

Note :- Make sure you have entered the details correctly. Because it can’t be changed further at any moment.
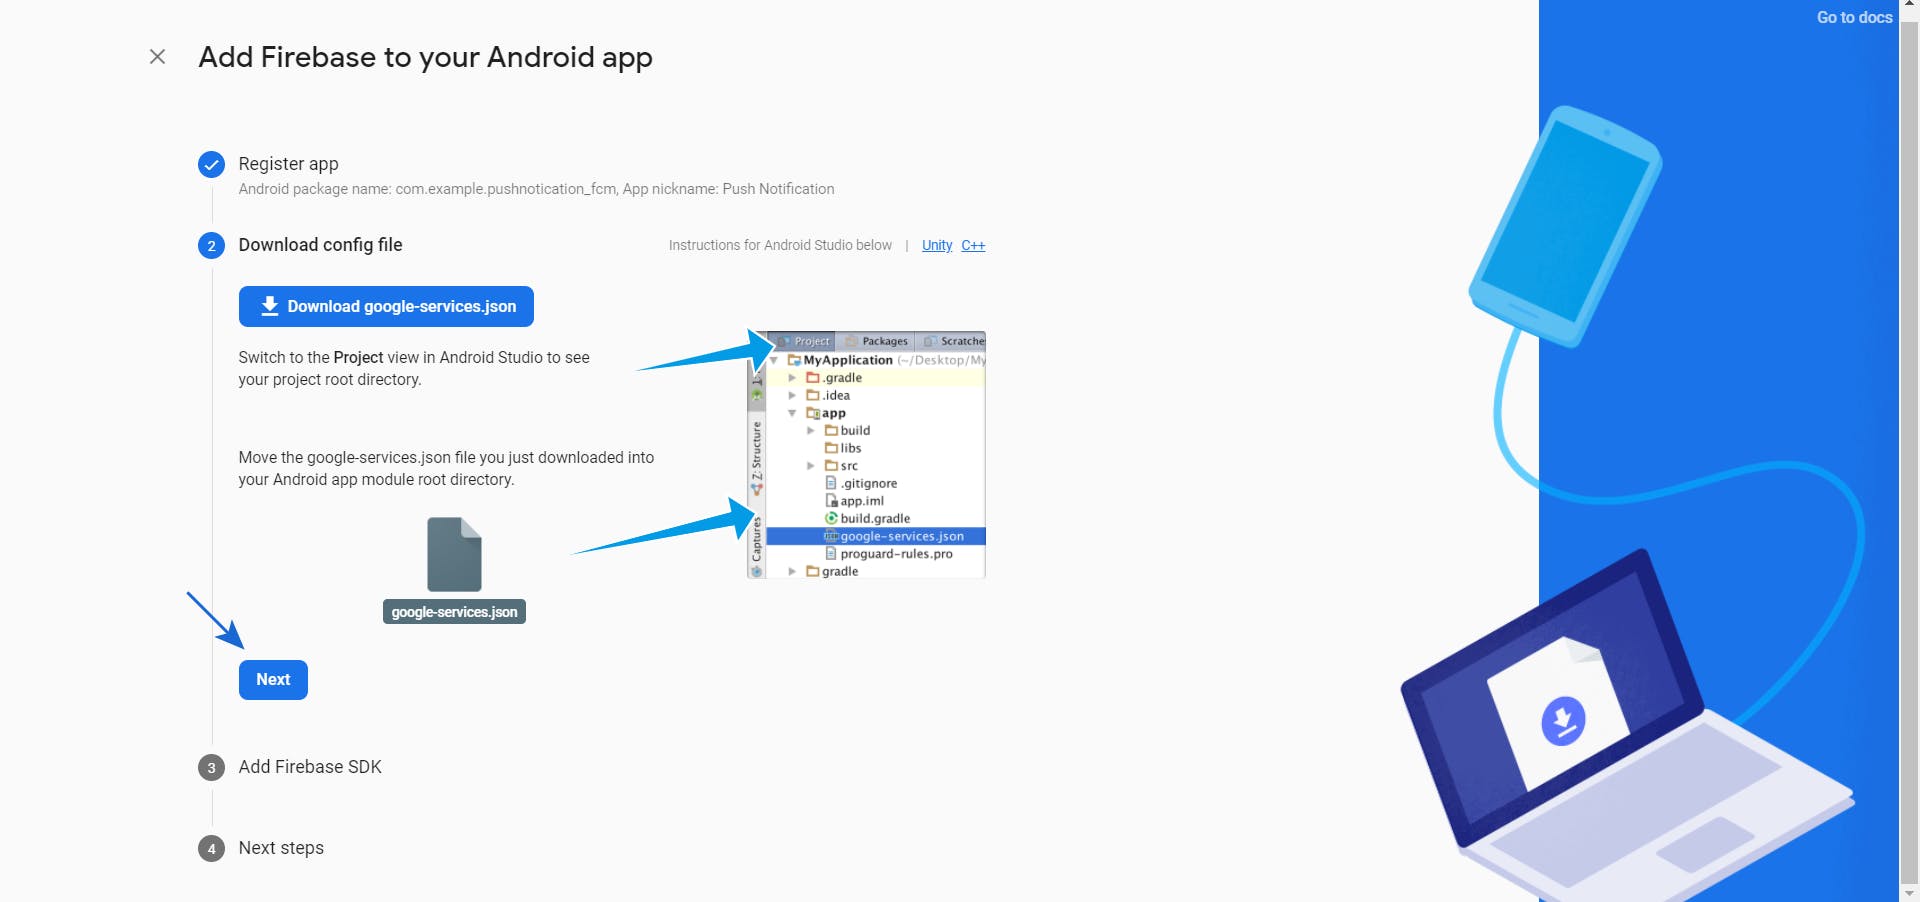
8) Download Config file
In this step, we need to download the config file named as the Google-service.json file.
And Move this file to Android app module root directory at this path <app-name>/Android/app/.
Keep those configuration files in ready-to-use with Flutter app later.
After that click next to continue.
9) Add Firebase SDK to your Flutter project.
For that you have to put Native Files in your Flutter Project. After this click Next
a) Edit the firebase SDK file at this path<app-name>/Android/build.gradle
b) Edit the java file at this path<app-name>/Android/app/build.gradle
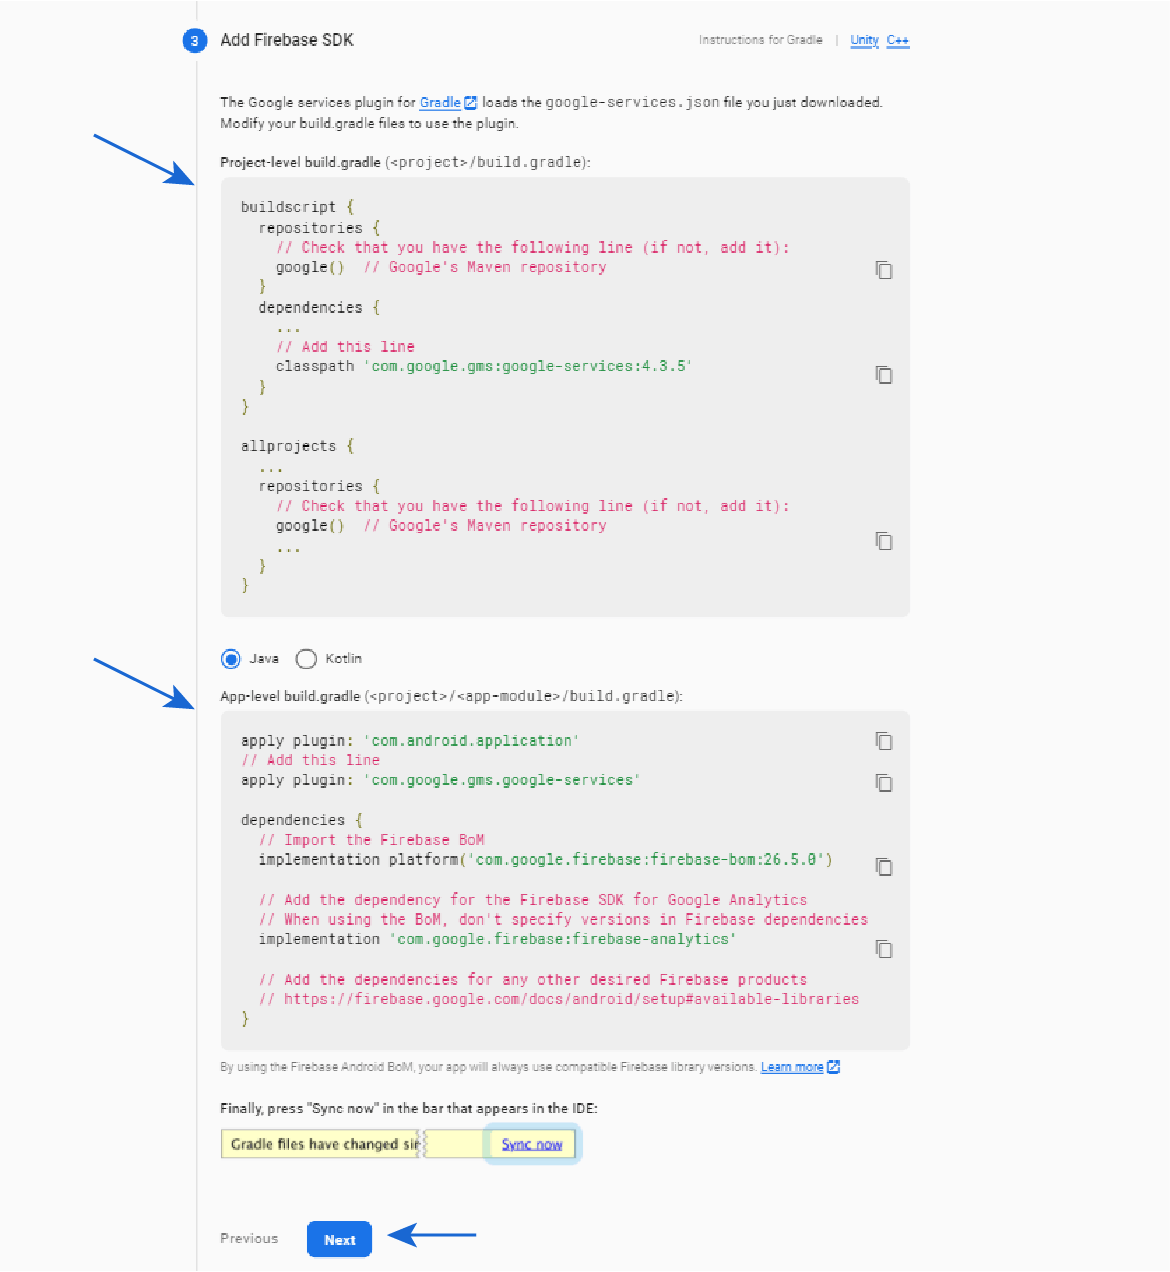
After doing this final step you are have finally registered your Flutter with firebase.
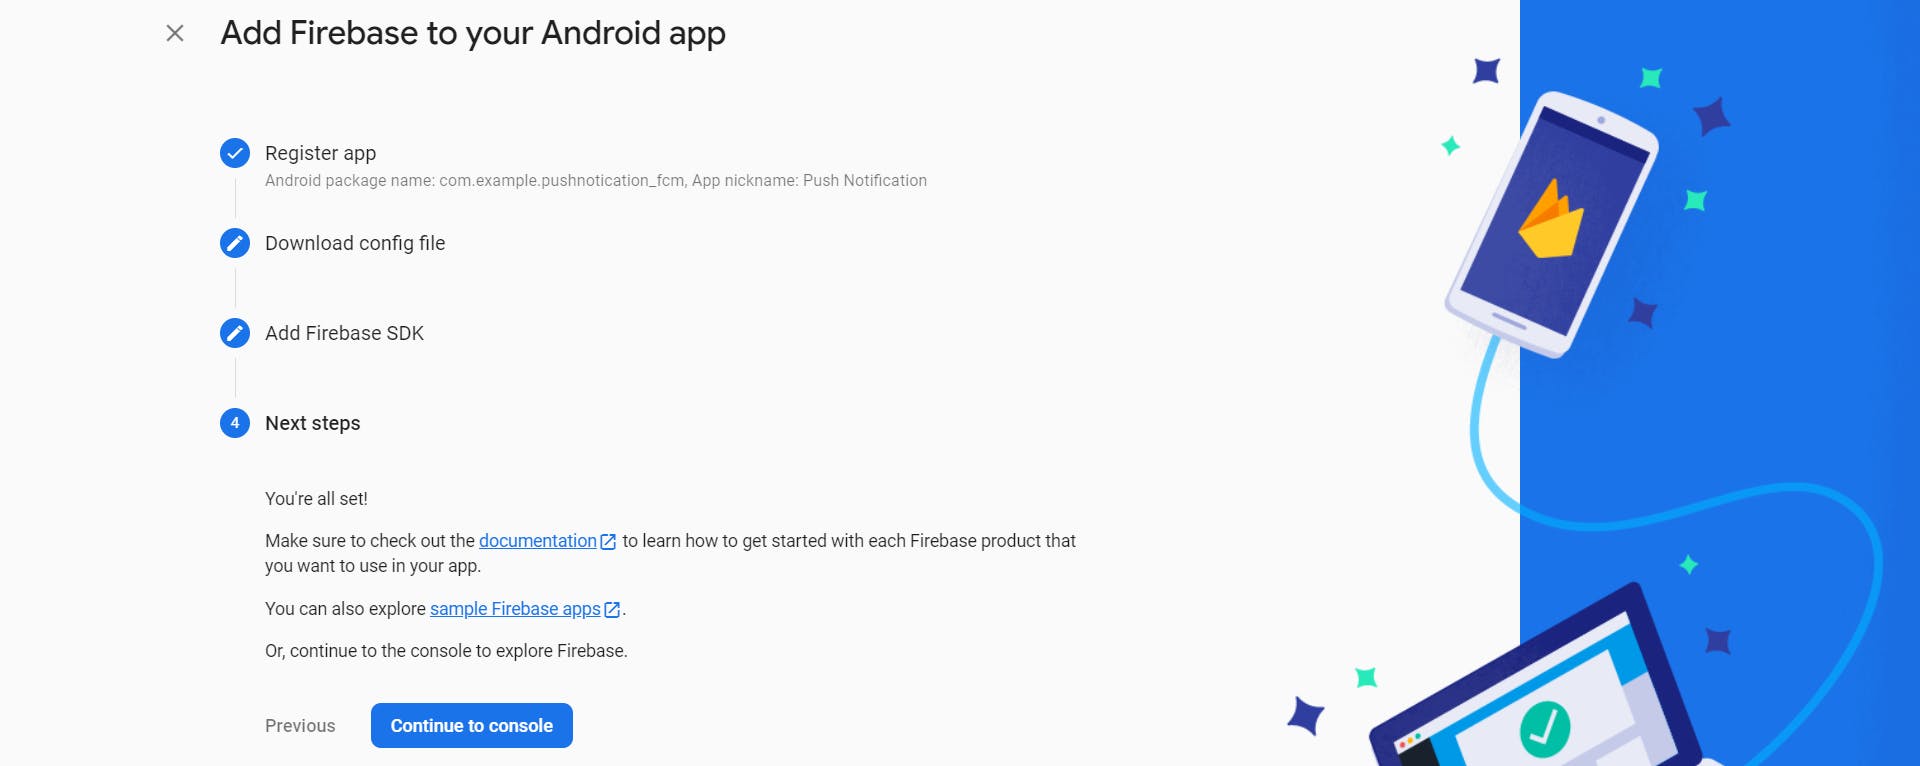
Now it's testing time
Let's check your Flutter app is successfully register with firebase or not!
For that go to Firebase and then Go to your create project Dashboard.
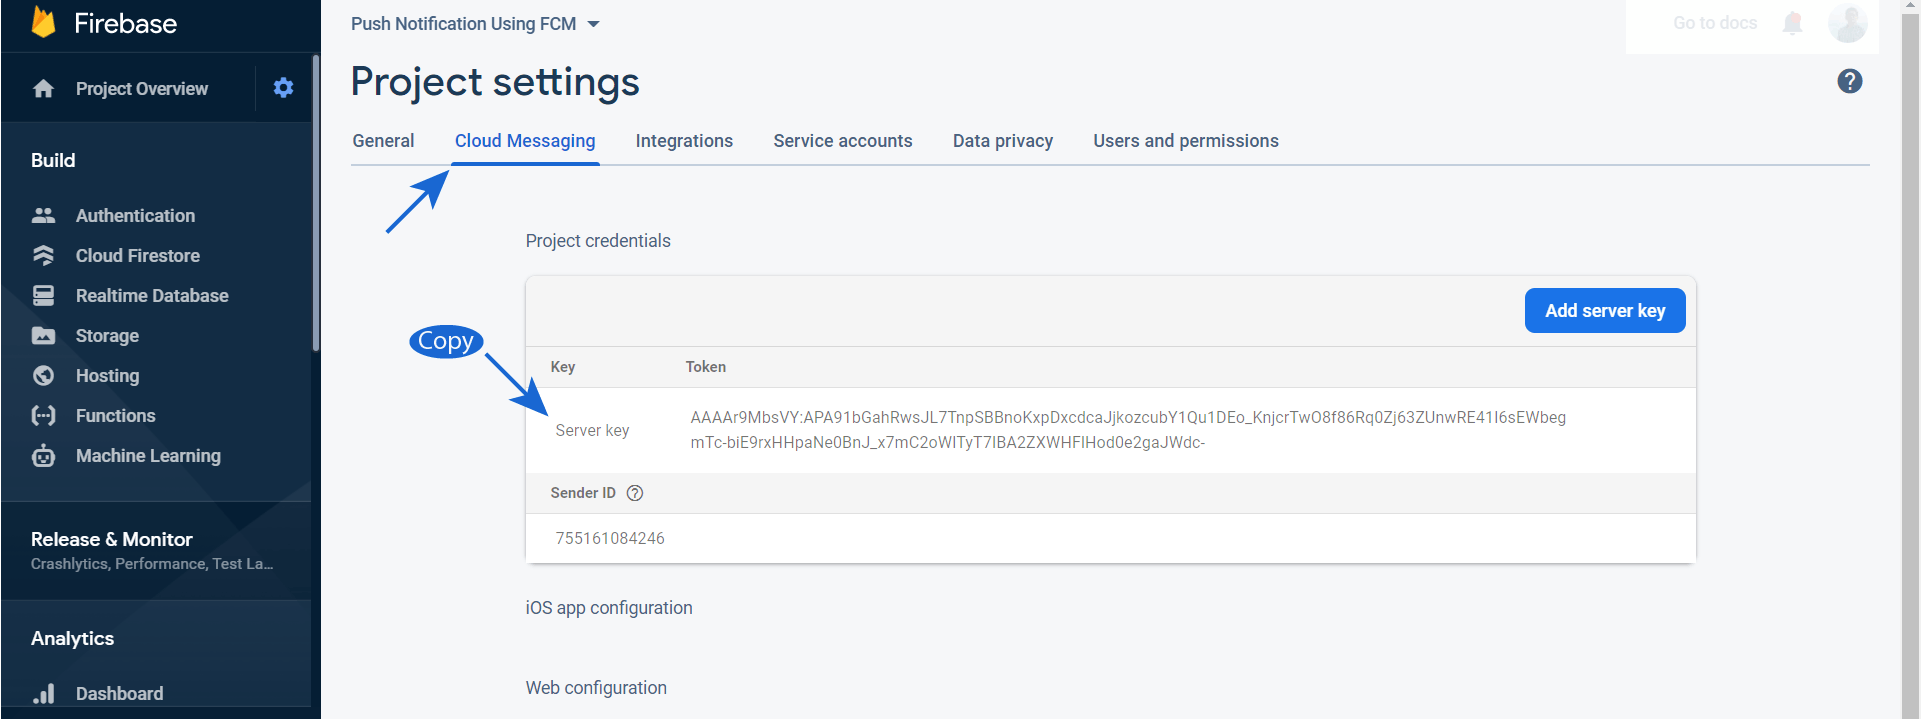
Now open navigator menu and click Setting icon and after that click Project settings as shown below.
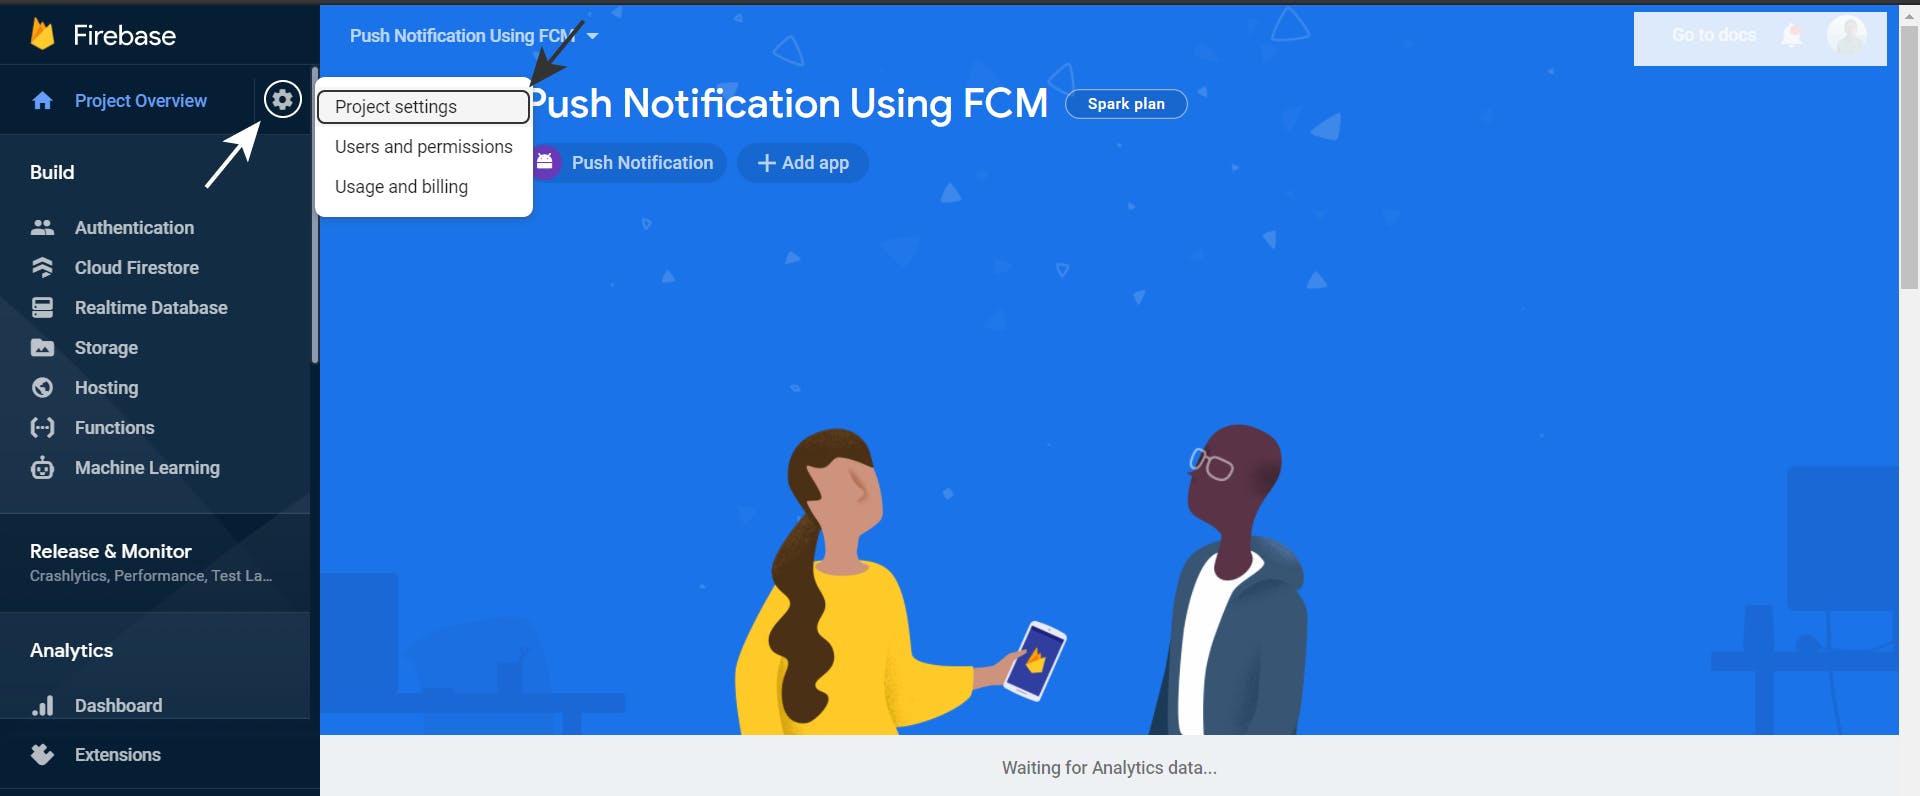
Inside it click Cloud Messaging from menu bar. And copy the Server key.
Note: This key is registered with our flutter app and it is necessary to send notification.
Copy the server key and go to Cloud Messaging.
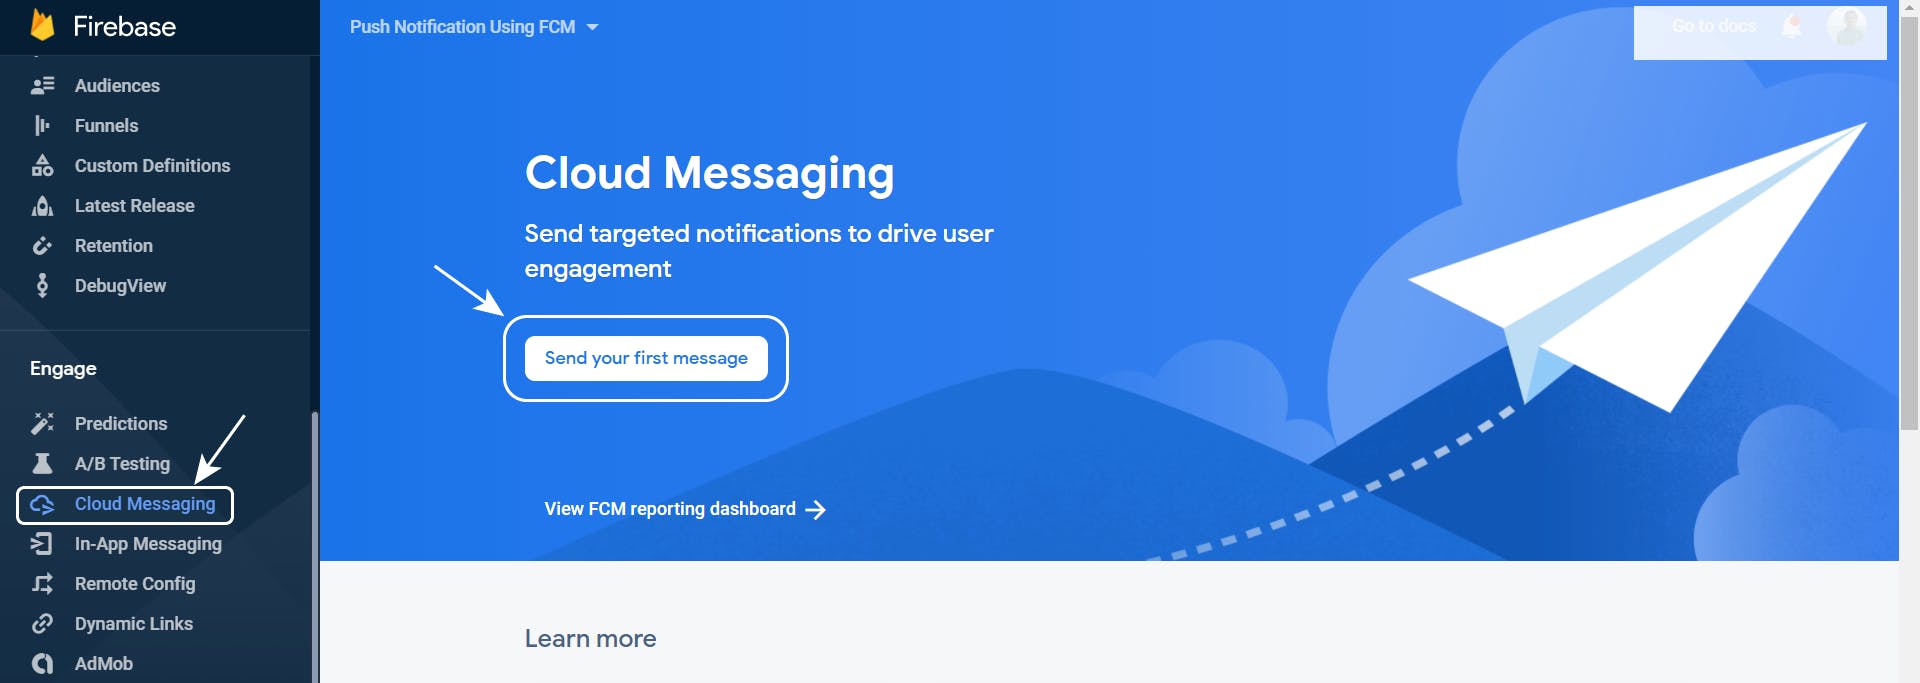
Hit on send your first message and provide the notification details.
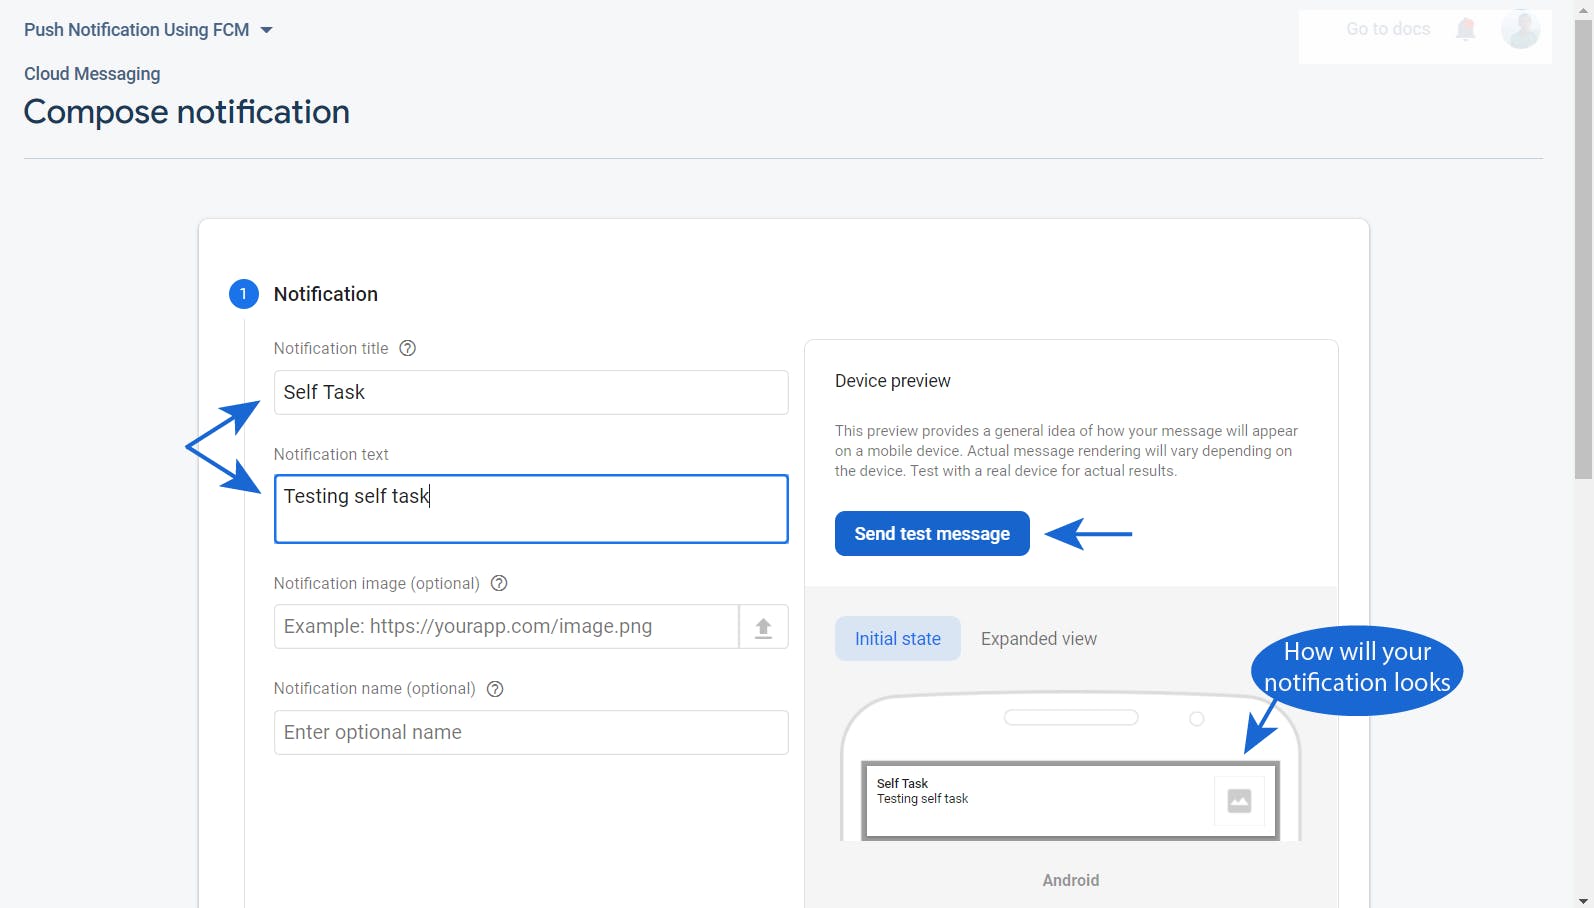
After that enter what you what to show in form of Notification title and Notification text, then click Send test message.
Paste your server key, and then click + button.
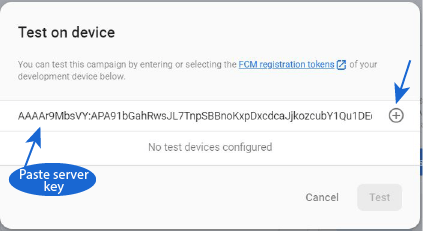
Now click Test button to send notification the device.
Here is the Output.

Congratulations 🥳, we have successfully completed the setup part. Now in next tutorial we'll go through some coding part.